Category Archives: recipes

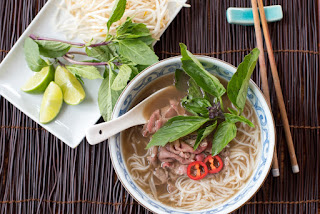
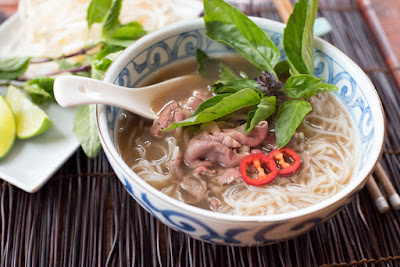
Beef Pho with Licorice Fern

EVERYONE AT THE Mekong Market on Rainier Avenue knew what I was up to. The proprietor, always on the move, paused long enough to look at the two packages of beef bones in my basket and give me the thumbs up. They were a dollar a pound. Then he guided me by the elbow to a refrigerated aisle with fresh rice stick noodles.

At the checkout, as I unloaded a bunch of basil, bean sprouts, a box of yellow rock sugar, and those fresh noodles, the customer in front of me said, “So you’re making pho?”

I explained that I had a sick kid at home and this was his request. It was my first attempt. 

“Make sure to boil out the impurities,” she added. This is a common refrain. All my sources recommend a brief (three to five minutes) initial boil to exorcize from the beef bones what some call impurities and other call, simply, the scum.

I’m all for getting rid of the scum.

Here in Seattle there is likely more pho noodle soup for sale than any other dish. It’s our favorite fast food. My kids have grown up with it and have some opinions. I wanted to do it right.

Besides making comfort food for my ailing boy, I also wanted to test an idea that had been percolating in my head for a couple years. There are two ingredients in a typical pho meant to impart a hint of licorice-like flavor, specifically star anise and fennel seeds. Star anise is native to southeast Asia. I wondered if I might use our native licorice fern instead of a spice from halfway around the world. (Read more about licorice fern here.)
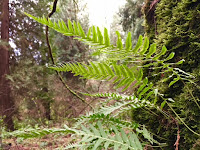
I split my batch of pho and designed a simple A-B test: one pot spiced with star anise and the other with licorice fern.

The short answer is that both phos were smashing. The licorice fern, however, won’t end up as a local substitute for star anise in my future attempts. Instead, it proved to be yet another possible variation in an eminently malleable dish that’s always been a cultural mashup from its earliest beginnings in French-colonial Vietnam.

After testing the two batches, I recombined them. The fern root can’t take the place of star anise, but like a stick of black licorice candy, it adds a back-of-the-palate sensation of spicy coolness—a palpable sensation similar to the way Sichuan peppercorn numbs and tingles the lips.

There are plenty of very similar recipes online for pho. Most of them recommend using cut up beef bones (knuckles, shins, etc.) and doing an initial boil to cook out the foam and impurities. This results in a broth that isn’t murky. Charring the onions and ginger in the broiler before adding to the broth is another crucial step. I adapted my recipe from this video.

5 – 6 lbs beef bones
6 quarts cold water
2 medium onions, quartered
4-inch piece of ginger, halved lengthwise
1/4 cup fish sauce
1 1/2 tbsp salt
1-inch piece yellow rock sugar
2 cinnamon sticks
1 tbsp coriander seeds
1 tbsp fennel seeds
6 star anise
6 cloves
2 pencil-sized licorice fern roots, peeled and cut into 1/4-inch pieces
thin-sliced beef such as rib-eye, skirt, ti-tip, sirloin, etc.
1 package thin bánh phở rice stick noodles
sprigs of basil, mint, cilantro
bean sprouts
lime
thin-sliced red pepper
sriracha and hoisin sauce

1. In a large stock pot, cover beef bones with cold water and heat over high flame.

2. Meanwhile, heat oven on broil and place onions and ginger in a roasting pan just beneath heat. Roast 15 – 20 minutes, turning occasionally with tongs, until charred on all sides.

3. Toast spices (cinnamon sticks, coriander seeds, fennel seeds, star anise, and cloves) in a dry pan over low heat for 5 minutes, careful not to burn.

4. When stock pot comes to boil, cook 3 minutes so that scum rises to the surface. Drain in sink and rinse bones and pot with warm water. Return bones to pot and cover with 6 quarts of cold water. Bring to boil once again, then reduce heat to simmer.

5. Once broth is simmering, add roasted onions and ginger, fish sauce, salt, yellow rock sugar, toasted spices, and licorice fern. Simmer, uncovered, at least 3 hours. Skim off any scum that rises to surface.

6. Remove bones with tongs, then strain broth through a fine mesh strainer to remove remaining solids. Refrigerate broth overnight to easily separate remaining layer of fat, if desired.

7. To assemble finished dish, add rice noodles and thin-sliced beef to bowl. Cover with hot broth and serve with bean spouts, lime wedges, hot pepper slices, and sprigs of basil, cilantro, and mint, along with condiments such as sriracha and hoisin.

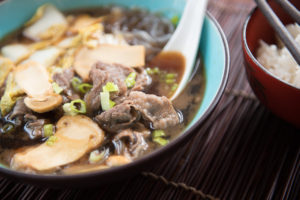
Matsutake Sukiyaki Hotpot

AS A CHILD of the seventies, I’m well acquainted with regrettable fads, from pet rocks to Farrah Fawcett haircuts.
Fondu is not among them.

Our family loved fondu, one of many food crazes during that unfairly maligned decade, and we went through a few different fondu cooking sets just as Star Wars was beginning its long run. Invariably the slender forks got lost or broken, and anything made of wood ended up scorched by the little Sterno tins. But under the Christmas tree each year there would be a fresh new set to put to work.

Forget the Euro-Swiss cheese thing. We all preferred meat fondu, cooked in a pot of boiling oil that could have easily sent one of us kids to the ER with a misplaced elbow, not that anyone worried about stuff like that back then. My dad would bring home good beef from the butcher, pre-cut into small cubes; Mom kept the cupboard stocked with the few sauces available at the time, most of them with a Kikkoman label.

I WAS REMINDED of these good times around the fondu pot after spending an evening with my friend Taichi Kitamura recently at his top-notch Japanese restaurant, Sushi Kappo Tamura, devouring Sukiyaki Hotpot.

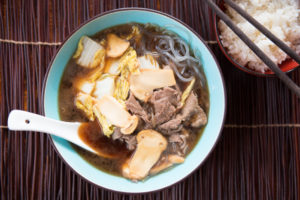
It was the tail-end of matsutake mushroom season in the Pacific Northwest and Taichi invited me to partake in a traditional preparation. With a dozen of us at the table, he had three bubbling hotpots along with platters overflowing with matsutake mushrooms, thinly sliced rib-eye and short rib, Napa cabbage, tofu, and pre-cooked cellophane noodles.

Taichi doesn’t use beef stock in his broth, or any stock for that matter, and I soon discovered that a simple mixture of water, sake, and soy sauce (sweetened with sugar) becomes increasingly profound as more ingredients, especially fresh slivers of matsutake buttons and premium cuts of beef, are cooked in it over the course of the evening.

The matsutake gives the broth its signature taste that is reminiscent of cinnamon and spice yet earthy and, for lack of a better word, fungaly. Autumn aroma is how the Japanese describe this tantalizing flavor. By the end, all the guests were clamoring for to-go containers so they could take home the rich dregs of this amazing broth mixed with a little rice.


3 cups water
1 cup soy sauce
1 cup sake
1/3 cup sugar (or more, to taste; Taichi will use as much as 3/4 cup)
3 – 4 (or more) matsutake buttons, thinly sliced
1 lb beef, thinly sliced (rib-eye, short rib, etc.)
1 lb cellophane noodles, pre-cooked
1/2 small Napa cabbage, sliced into wide ribbons
1 package tofu, cubed
1 small onion, sliced into half-moons (optional)
rice to accompany

1. Make rice and prepare raw hotpot ingredients: arrange beef on a platter, cube tofu, slice matsutake mushrooms and cabbage, and boil noodles until al dente before rinsing with cold tap water.

2. In a pot mix together water, sake, soy sauce, and sugar. Bring to a boil, then reduce heat slightly. Allow some of the sake alcohol to burn off before adding matsutake. Cook matsutake at a low boil or high simmer for a few minutes until its flavor has infused the broth, then begin adding raw ingredients in small portions. Add noodles last, just before ladling into bowls and serving with rice. Repeat. And repeat again.

Serves 4.

Wild Ramp Aioli

ramp1ONE OF THE BENEFITS of picking morels east of the Rockies is the chance to find ramps.
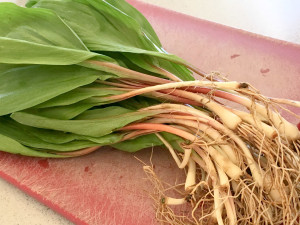
ramp4The wild leeks are beloved in the Appalachians, especially in West Virginia where nearly every little mountain town has a ramp festival, and in the northern woods of Michigan. On my last visit to the Upper Peninsula I picked ramps with friends from Marquette. But that was a while ago, and if there’s one wild food I wished was native to the Pacific Northwest, the ramp would be near the top of the list.

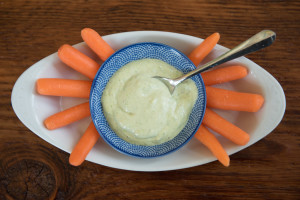
To make this wild ramp aioli I used pickled ramps. The recipe is a conflation of Earthy Delight’s version and Tartine’s. You can use fresh ramps, too.

3 pickled or fermented ramps*, with tops**
1/2 tsp dried mustard
1/2 tsp peppercorns
1/2 tsp apple cider vinegar
2 tsp lemon juice
1 egg yolk
1/3 cup grapeseed or canola oil
2 tbsp olive oil
salt to taste

1. Place food processor bowl and blade in freezer for 15 minutes if possible.

2. Chop ramps. (I used previously pickled ramp bulbs and fresh tops—see notes below.)

3. Add chopped ramps, dried mustard, peppercorns, cider vinegar, lemon juice, and egg yolk to food processor and process until well mixed together, about 30 seconds.

4. Combine oils and slowly add to processor. Ingredients should thicken to a mayo-like consistency. Continue to add oil. Add salt to taste and more lemon juice or vinegar if necessary.

5. Refrigerate in a tightly sealed container.

Makes enough to fill a 6-oz jelly jar.

The ramp aioli will have the rich flavor and creamy consistency of a typical aioli or mayonnaise, but with the added garlicky bite of wild ramps. Using just the yolk and not the egg white will give it more body. For a chunkier aioli with flecks of bright green ramp tops, don’t over-process (unlike mine pictured above).

* Pickled Ramps recipe:

ramp2

1lb ramps
1 cup white wine vinegar
1 cup water
1 cup sugar
1 tsp mustard seed
1 tsp coriander seed
1 tsp fennel seed
2 tsp mixed peppercorns
1 bay leaf
1 tbsp salt


1. Cut off root tips from ramps and trim leaves, leaving just a little green. Reserve tops for another use. Rinse ramps.

2. Blanche trimmed ramps in a pot of salted boiling water for 30 seconds. Remove and quickly shock under cold tap. Pat dry and place in a pint-sized canning jar.

3. Combine pickling ingredients in saucepan and bring to a boil. Pour over ramps and set aside to cool. Seal tightly and refrigerate up to two months.

** If using fresh ramps for the aioli, cut off the tops (the green leaves) and then blanche the tops in boiling water for 30 seconds, shock under cold tap, and squeeze out excess water before adding to food processor.

Licorice Fern Liqueur

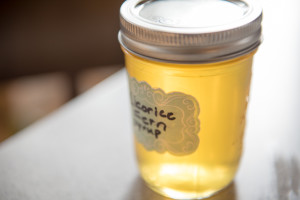
licorice_fern1THE LICORICE FERN is a beauty that lives in colonies in mixed lower-elevation forests of the Pacific Northwest, where it grows on trees, often well up in the canopy.
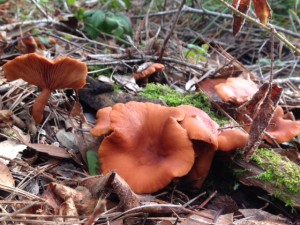
The flavor of the root is licorice-like, yes, and also spicy like fresh ginger. Infused in water or vodka, it makes a slightly picante syrup or liqueur that will remind you of the mesmerizing glades of spring licorice fern as you sip a thirst-quenching summer cocktail.

1. Peel and chop a few finger-length pieces of licorice fern root.

2. Cover chopped roots in a half-pint canning jar with vodka (for a liqueur) or water (for a syrup).

3. Refrigerate for two to three weeks, shaking every few days.

4. Strain and measure liquid. Make a simple syrup of equal parts water and sugar that is half the amount of reserved liquid. For example, with my 2/3 cup of fern-infused liquid I made a syrup with 1/3 cup water and 1/3 cup sugar. To make the syrup, boil the water and whisk in sugar until fully dissolved. Allow syrup to cool, then add to reserved liquid.

Licorice fern liqueur can jazz up a refreshing glass of soda water, improve a cheap prosecco, or comfortably join the other esoteric mixers at your cocktail bar.

Candy Cap Custard

candycap3CANDY CAPS ARE a complex of species in the milk cap genus, Lactarius. They’re noteworthy for smelling of maple syrup once dried, effectively putting mushrooms on the dessert menu. Two species of candy cap are commonly encountered in coastal California: L. rubidus and L. rufulus. The latter grows with oaks and is quite mild, but the former—if dehydrated at a low temperature (I think we set our dryer to 95 degrees)—is wonderfully fragrant. We found hundreds of them recently growing among a stand of old Monterrey pines.

The first thing I made when I got home with my bounty was an egg custard, adapting a very simple recipe that I typically make with huckleberries. The candy caps gave this creamy and satisfying dessert a pungent aroma of maple syrup, which paired well with the huckleberries on top.

candycap11 small handful dried candy caps
1 cup evaporated milk
1 cup water
4 egg yolks
1/3 cup sugar
1/4 tsp salt
1/2 tsp vanilla extract
1/2 cup huckleberries (or blueberries)
fresh nutmeg or cinnamon, grated to taste

1. Pulverize dried candy caps to dust in a spice grinder or food processor. Pass through wire mesh sieve to remove any large pieces. Cover mushroom dust with 1 cup warm water and set aside for 20 minutes.

2. Pre-heat over to 325 degrees. Combine milk and mushroom water in a small saucepan and bring to boil. Remove from heat.

3. Mix egg yolks, sugar, salt, and vanilla together in a bowl.

4. Slowly whisk in hot milk-water mixture until frothy. Pour into 4 ramekins.

5. Place ramekins in an oven-proof dish or tray filled with warm water. Bake for 40 minutes. Carefully place a small handful of huckleberries atop each custard and bake another 10 minutes. Test one for doneness with a knife tip; if it comes away clean, the custard is done. Sprinkle with fresh nutmeg or cinnamon. Serve hot or cold.

Serves 4.

Wild Mushroom Bread Pudding

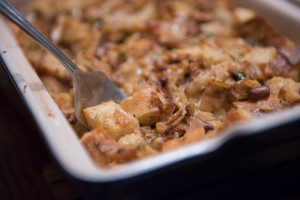
pudding1THIS TOTALLY UN-FUSSY bread pudding shines with a medley of wild mushrooms.
4 – 6 cups stale country bread, cut into 1-inch cubes
4 tbsp butter, divided (plus more if needed)
2 medium yellow onions, chopped
1 lb wild mushrooms (e.g., chanterelles, porcini, hedgehogs, etc.), rough cut
3 large eggs
2 cups half and half
1 heaping cup grated Gruyère cheese
handful parsley, chopped
salt and pepper, to taste

1. In a large skillet, sauté onions in 2 tablespoons of butter over medium heat until caramelized. Add more butter if necessary and reduce heat so that onions are nicely browned and not burned. Remove from pan.

2. Pre-heat oven to 350 degrees.

3. In same pan, melt another 2 tablespoons of butter over medium heat and sauté mushrooms. Cook off any liquid released by mushrooms and season with salt and pepper. Remove from pan.

4. Beat eggs in a large bowl with half and half. Mix in grated cheese and parsley. Season with salt and pepper, to taste. Add bread, onions, mushrooms, and stir together.

5. Grease an 8-inch baking dish and dollop in bread pudding. Cover and bake for 20 minutes. Remove lid and bake another 20 minutes, until pudding begins to brown on top and is cooked through.

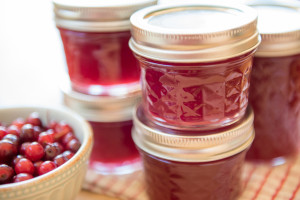
Chokecherry Jelly

chokecherry1THE CHOKECHERRY (Prunus virginiana) is a shrub or small tree native to much of North America, mostly above the Mason-Dixon line. Here in Washington State, as in much of the Western U.S., chokecherries prefer drier habitats such as arid canyons, gullies, and scrubby benches above lakes or streams, where you’ll sometimes find them clustered with elderberries and serviceberries.

Named for their astringency, chokecherries get sweeter as they darken, but if you wait too long the birds and other critters will nab them first. And so, finding ourselves in a patch of not fully ripe chokecherries the other day, we picked them anyway.

At home we rinsed our chokecherries and then covered them with water in a kettle. The kitchen soon filled with a distinctive cherry aroma as they simmered on the stove. After processing the fruit we had a quart of fuchsia-colored juice which went right back into the pot.

The resulting jelly has a luminous color, right up there with rosehip Jelly. Even with added pectin, the jelly is soft and smooth, barely holding together, which is just how we like it.

This recipe is for 4 cups of chokecherry juice. It’s on the tart side. If you like your jelly sweeter, or you have less juice, adjust accordingly. You’ll need to add a commercial pectin because chokecherries are low in natural pectin.

4 cups chokecherry juice
5 cups sugar
1 package (1.75 oz) dry pectin
1/2 cup lemon juice

1. Cover chokecherries with water in a non-reactive stock pot and bring to boil over high heat. Reduce heat and simmer 30 minutes, occasionally mashing softened chokecherries with a potato masher. Allow to cool, then strain juice through cheesecloth.

2. Return 4 cups chokecherry juice to pot along with pectin and lemon juice. Bring to boil and add sugar, stirring. After a minute of hard boiling (careful not to foam over), reduce heat and simmer for 5 minutes, stirring.

3. Remove from heat and skim foam. Ladle into sterilized canning jars, leaving 1/2 inch head room, and secure lids. Process jars in hot water bath for 10 minutes.

Pasta with Oyster Mushrooms and Smoked Ham Hock

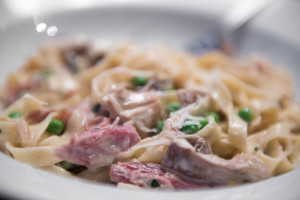
oyster_pastaI’VE MADE PLENTY of Asian-style dishes with wild oyster mushrooms, like Bibimbap and Udon Soup. This time I used cultivated oysters in a classic Italian pasta with a smoked ham hock that I braised in white wine, chicken stock, fennel, onion, and garlic. The resulting stock became the base of the sauce and was insanely savory, while the tender hock meat paired perfectly with the robust and chewy oyster mushrooms.

Growing oyster mushrooms at home is a fun science experiment, especially for kids, and at the end you get a delicious meal.

Braised Ham Hock

1 ham hock
1 cup white wine
1 cup chicken stock
1/2 small fennel bulb, chopped
1/2 small onion, chopped
2 cloves garlic, pressed
1/2 tsp black peppercorns

Pasta Sauce

2 tbsp butter, divided, plus extra if necessary
1 large shallot, diced
1/2 pound oyster mushrooms, chopped
1/4 cup white wine
1/2 cup reserved braising stock
1/2 cup heavy cream (or milk or half and half), divided
1/2 cup reserved braised ham hock meat
1/4 cup frozen peas
1 – 2 oz goat cheese
1/4 cup parmesan cheese, grated
8 oz fresh pasta

1. Braise smoked ham hock. I had my butcher saw the hock in half, then I braised it in a small pot with white wine, chicken stock, fennel, onion, garlic, and peppercorns. The liquid should cover about two-thirds of the hock. Simmer, with lid on, for about two hours, checking occasionally to make sure there’s enough liquid, until meat falls off the bone. Add more water, stock, or wine if necessary. When meat is tender, discard bone and fat, reserving braised ham. Strain stock and reserve. You should have plenty of meat and some stock left over for another use. Set aside enough meat and stock for pasta, about a half-cup of each.

2. Over medium heat sauté diced shallot in a tablespoon of butter. Add chopped oyster mushrooms and cook together several minutes. Add more butter if necessary. Deglaze with a splash of white wine. Add a ladle of reserved braising stock and a quarter cup (or more) of cream or milk and reduce over low heat.

3. Pre-heat oven to 350 degrees. Add 1 tbsp butter and quarter cup of cream or milk to large pasta bowl and warm in oven.

4. Cook and drain pasta according to directions. Meanwhile add frozen peas, braised ham, and goat cheese to sauce, stir lightly for a minute, and toss with pasta in warm bowl. Finish with grated parm.

Saffron Milk Caps

milkcap3THE SAFFRON MILK CAP is a wild mushroom that most pot hunters leave to the Russians. That’s too bad because it’s tasty and abundant.

Saffrons, or ryzhiki in Russia, are actually a complex of species in the Lactarius genus, and much DNA work needs to be done to separate the North American varieties. They’re called milk caps for a latex they exude when cut. Some milk caps bleed white, some yellow, others red or orange.

Eastern Europeans have admired saffron milk caps for eons. I see Russians and Ukrainians in the woods outside Seattle carrying baskets overflowing with saffrons while their competition from other parts of the world is only too happy to leave the milk caps in the duff and fill their own buckets with matsutake or hedgehogs.

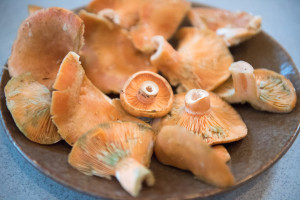
Saffrons bleed red or orange. The two most common saffrons for the table are Lactarius rubrilacteus and L. deliciosus (again, these taxonomic names are likely to change with future genetic testing)Both will bruise a greenish color (see photo above), which vanishes with cooking. I found the saffrons pictured here at about 4,000 feet in the North Cascades on the edge of an old-growth forest of mostly silver fir and hemlock amidst a few patches of snow on the ground. They bled a reddish-orange color (see photo below right), though not profusely, and the green bruising was minimal. Saffrons generally have zonate caps (concentric bands in varying hues of orange, pink, red, or green) but these rings were very subtle in my specimens. As you can see, they also had hollow or partially hollow stems.

Perhaps one of the reasons many pot hunters don’t eat saffrons is the difficulty of identifying to species. With most mushrooms that’s a no-no—and I’m still not sure exactly what species the pictured saffrons are, though L. aestivus is a good guess.

Saffron milk caps are versatile in the kitchen. Pickling is popular among Eastern Europeans. Sautéed, saffrons keep their salmon color and firm, almost crunchy texture. Some complain of graininess, but prolonged cooking eliminates this. The key to using saffrons is taking care of them in the field and then using quickly at home. These mature milk caps pictured, though completely bug-free, were more suitable for the pan than pickling due to their large size. The green bruising isn’t appetizing, but as I said, it disappears with cooking.

Recently I came across a mushroom cookbook with some excellent non-cheffy recipes for the home cook, The Edible Mushroom Book. The recipe that follows is adapted from that with a few tweaks.

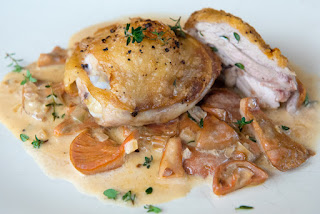
Pan-fried Chicken with Saffron Milk Cap Ragout

3 – 4 chicken thighs, skin on
1/2 lb saffron milk caps, cut up
2 shallots, diced
1 – 2 cloves garlic, crushed
2 tbsp vegetable oil
2 tbsp butter
1 cup white wine
1 cup chicken stock
1/2 cup heavy cream
2 – 3 fresh sprigs fresh thyme
salt and pepper

1. Pre-heat oven to 400 degrees. Pat dry chicken and season with salt and pepper. In a medium saucepan, heat oil over medium-high and pan-fry, skin side first, until golden, a few minutes on each side. Remove to an oven-proof dish and continue cooking in oven until juices run clear, about 20 minutes.

2. In same saucepan, melt butter and sauté diced shallots until soft and translucent. Add mushrooms, thyme, and crushed garlic and continue cooking together a few minutes. Season with salt and pepper.

3. Deglaze pan with white wine and reduce by half. Add stock and heavy cream and reduce until desired consistency. Spoon mushroom sauce on plates and then place chicken atop sauce.

Serves 2

Wild Mushroom Strudel

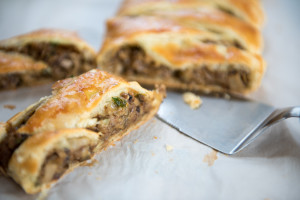
strudel4THIS WAS MY FIRST strudel. For this reason I kept things simple and bought frozen puff pastry from the store. You’re welcome to make your own.

A couple notes: braiding the puff pastry makes for an attractive presentation and allows air to escape through the vents so that the strudel doesn’t blow up into a monstrosity. The filling includes a medley of wild mushrooms. Dried porcini, though not mandatory, gives the strudel a deep mushroomy flavor. 

3 cups diced wild mushrooms
1 oz dried porcini (optional)
1 large shallot, diced
2 tbsp butter
olive oil
2 – 3 springs fresh thyme, de-stemmed
1/4 cup white wine
1 handful parsley, chopped
salt and pepper
1 sheet puff pastry
1 egg, beaten

1. If using dried porcini, pulverize in a food processor and rehydrate with 1 cup warm water. Set aside for 20 minutes.

2. Saute diced shallot in butter over medium heat until soft. Add diced mushrooms. Cook mushrooms and shallot together for several minutes. The mushrooms will soak up all the butter; add olive oil if necessary. When mushrooms begin to brown, deglaze pan with a splash of wine. Add mushroom stock and reduce until the mixture is moist but not wet. Stir in thyme and parsley. Season with salt and pepper to taste. Remove from heat.

3. Pre-heat oven to 350 degrees. Roll out puff pastry into a rectangle about  12 inches by 8 inches. Place pastry on a piece of baking parchment atop a cookie sheet. With a knife, make diagonal cuts to the edges of the two long sides, so that the pastry can be folded up in a braided pattern. Spoon mushroom mixture down the middle. Fold up the strudel and pinch the ends. Brush with eggwash and place in oven. Bake until golden, about 30 minutes.