Category Archives: putting up

Wild Ramp Aioli

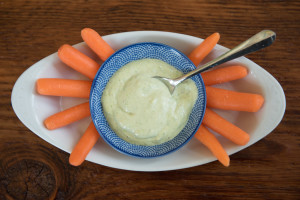
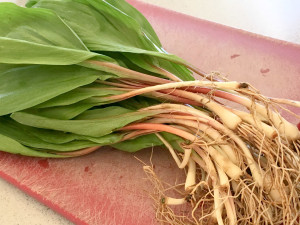
ramp1ONE OF THE BENEFITS of picking morels east of the Rockies is the chance to find ramps.
ramp4The wild leeks are beloved in the Appalachians, especially in West Virginia where nearly every little mountain town has a ramp festival, and in the northern woods of Michigan. On my last visit to the Upper Peninsula I picked ramps with friends from Marquette. But that was a while ago, and if there’s one wild food I wished was native to the Pacific Northwest, the ramp would be near the top of the list.

To make this wild ramp aioli I used pickled ramps. The recipe is a conflation of Earthy Delight’s version and Tartine’s. You can use fresh ramps, too.

3 pickled or fermented ramps*, with tops**
1/2 tsp dried mustard
1/2 tsp peppercorns
1/2 tsp apple cider vinegar
2 tsp lemon juice
1 egg yolk
1/3 cup grapeseed or canola oil
2 tbsp olive oil
salt to taste

1. Place food processor bowl and blade in freezer for 15 minutes if possible.

2. Chop ramps. (I used previously pickled ramp bulbs and fresh tops—see notes below.)

3. Add chopped ramps, dried mustard, peppercorns, cider vinegar, lemon juice, and egg yolk to food processor and process until well mixed together, about 30 seconds.

4. Combine oils and slowly add to processor. Ingredients should thicken to a mayo-like consistency. Continue to add oil. Add salt to taste and more lemon juice or vinegar if necessary.

5. Refrigerate in a tightly sealed container.

Makes enough to fill a 6-oz jelly jar.

The ramp aioli will have the rich flavor and creamy consistency of a typical aioli or mayonnaise, but with the added garlicky bite of wild ramps. Using just the yolk and not the egg white will give it more body. For a chunkier aioli with flecks of bright green ramp tops, don’t over-process (unlike mine pictured above).

* Pickled Ramps recipe:

ramp2

1lb ramps
1 cup white wine vinegar
1 cup water
1 cup sugar
1 tsp mustard seed
1 tsp coriander seed
1 tsp fennel seed
2 tsp mixed peppercorns
1 bay leaf
1 tbsp salt


1. Cut off root tips from ramps and trim leaves, leaving just a little green. Reserve tops for another use. Rinse ramps.

2. Blanche trimmed ramps in a pot of salted boiling water for 30 seconds. Remove and quickly shock under cold tap. Pat dry and place in a pint-sized canning jar.

3. Combine pickling ingredients in saucepan and bring to a boil. Pour over ramps and set aside to cool. Seal tightly and refrigerate up to two months.

** If using fresh ramps for the aioli, cut off the tops (the green leaves) and then blanche the tops in boiling water for 30 seconds, shock under cold tap, and squeeze out excess water before adding to food processor.

Licorice Fern Liqueur

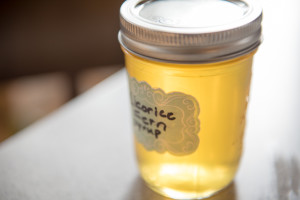
licorice_fern1THE LICORICE FERN is a beauty that lives in colonies in mixed lower-elevation forests of the Pacific Northwest, where it grows on trees, often well up in the canopy.

The flavor of the root is licorice-like, yes, and also spicy like fresh ginger. Infused in water or vodka, it makes a slightly picante syrup or liqueur that will remind you of the mesmerizing glades of spring licorice fern as you sip a thirst-quenching summer cocktail.

1. Peel and chop a few finger-length pieces of licorice fern root.

2. Cover chopped roots in a half-pint canning jar with vodka (for a liqueur) or water (for a syrup).

3. Refrigerate for two to three weeks, shaking every few days.

4. Strain and measure liquid. Make a simple syrup of equal parts water and sugar that is half the amount of reserved liquid. For example, with my 2/3 cup of fern-infused liquid I made a syrup with 1/3 cup water and 1/3 cup sugar. To make the syrup, boil the water and whisk in sugar until fully dissolved. Allow syrup to cool, then add to reserved liquid.

Licorice fern liqueur can jazz up a refreshing glass of soda water, improve a cheap prosecco, or comfortably join the other esoteric mixers at your cocktail bar.

Chokecherry Jelly

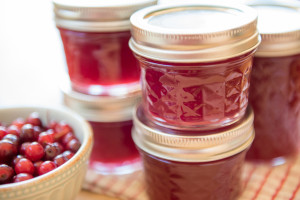
chokecherry1THE CHOKECHERRY (Prunus virginiana) is a shrub or small tree native to much of North America, mostly above the Mason-Dixon line. Here in Washington State, as in much of the Western U.S., chokecherries prefer drier habitats such as arid canyons, gullies, and scrubby benches above lakes or streams, where you’ll sometimes find them clustered with elderberries and serviceberries.

Named for their astringency, chokecherries get sweeter as they darken, but if you wait too long the birds and other critters will nab them first. And so, finding ourselves in a patch of not fully ripe chokecherries the other day, we picked them anyway.

At home we rinsed our chokecherries and then covered them with water in a kettle. The kitchen soon filled with a distinctive cherry aroma as they simmered on the stove. After processing the fruit we had a quart of fuchsia-colored juice which went right back into the pot.

The resulting jelly has a luminous color, right up there with rosehip Jelly. Even with added pectin, the jelly is soft and smooth, barely holding together, which is just how we like it.

This recipe is for 4 cups of chokecherry juice. It’s on the tart side. If you like your jelly sweeter, or you have less juice, adjust accordingly. You’ll need to add a commercial pectin because chokecherries are low in natural pectin.

4 cups chokecherry juice
5 cups sugar
1 package (1.75 oz) dry pectin
1/2 cup lemon juice

1. Cover chokecherries with water in a non-reactive stock pot and bring to boil over high heat. Reduce heat and simmer 30 minutes, occasionally mashing softened chokecherries with a potato masher. Allow to cool, then strain juice through cheesecloth.

2. Return 4 cups chokecherry juice to pot along with pectin and lemon juice. Bring to boil and add sugar, stirring. After a minute of hard boiling (careful not to foam over), reduce heat and simmer for 5 minutes, stirring.

3. Remove from heat and skim foam. Ladle into sterilized canning jars, leaving 1/2 inch head room, and secure lids. Process jars in hot water bath for 10 minutes.

Smoked Salmon Candy

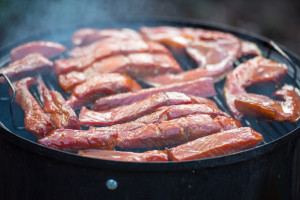
candy2I LIKE TO make salmon candy with the collars and belly strips. It’s sweeter than my usual smoked salmon and makes a good treat while out on a hike or mushroom hunting.

Dry brine:

1 cup pickling salt (or regular, non-iodized)
4 cups dark brown sugar

Glaze:

1/4 cup maple sugar
2 tbsp dark brown sugar
1/4 tsp kosher salt
1/4 cup Grand Marnier

1. Mix the dry brine. My standard brine is a 1:4 ratio of salt to dark brown sugar for a 12 hour brine. Often I’ll add a whole head of chopped garlic and fresh ground pepper to this, and sometimes other spices as well. For salmon candy, I keep it simple: just salt and dark brown sugar.

2. Prepare the salmon. Remove pin bones with pliers and cut fillets into strips (with a large chinook, my strips are 2 to 3 inches wide).

3. Pack the salmon pieces with dry brine in a non-reactive (e.g., Pyrex) dish, skin up for a single layer. If stacking fish in more than one layer, place first layer skin down and second layer skin up, so the fish is flesh to flesh, with the dry brine packed between. Brine overnight or 12 hours. The brine will be soupy by the end.

4. Remove salmon pieces from dish and rinse with cold water under tap. Place skin down on wire racks to dry for 2 to 4 hours. Don’t cheat on this step. It’s important to let the fish dry and firm up; the exterior should be tacky, not wet. A pellicle forms, which helps retain moisture and flavor during the smoking process. I speed up this step up with an electric fan, but it still takes at least a couple hours.

5. Smoke the salmon in your usual way, low and slow if possible. I use a Weber Bullet, which is a hot smoker, meaning the heat from the fire and not just the smoke contributes to the cooking and smoking process, so I try to keep my bed of coals fairly small and heavily damped down. The temperature ranged from 125 to 150 degrees for the first three hours, and then 100 degrees for the last two hours. Cherry or apple wood is good (I used apple this time). A long, low smoke is preferable, especially for candy. While the fish is smoking, brush on glaze periodically, once an hour or so.


Pickled Chanterelles

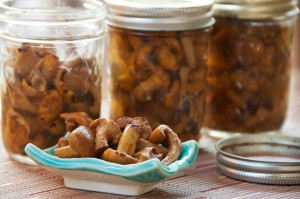
chanterelle_pickle1MOST YEARS I’LL sauté and freeze enough chanterelles to get me through the off-season. This year, with an abundance of mushrooms, I’m also dehydrating and powdering the larger chanterelles to make spice rubs and pickling the smaller ones.

Here’s a very simple way to pickle chanterelles. The key is to get as much moisture out of the mushrooms before pickling so that they can then be bathed in liquid later. This makes for flavorful mushrooms with firm texture. You can use any sort of vinegar, but cider vinegar complements the hints of stone fruit in chanterelles, while the addition of water insures that the mushroom’s delicate flavor isn’t overpowered.

2 lbs chanterelles
1 1/2 cups cider vinegar
1/2 cup water
1 tbsp kosher salt, plus a pinch
2 tbsp sugar
1 tbsp pickling spices *

* I used a commercial pickling blend that included black peppercorns, allspice, coriander seeds, mustard seeds, bay leaf, red chili pepper, ginger, cinnamon, cloves, mace, and cardamon. An equivalent amount of black peppercorns, allspice, and coriander seeds is fine, plus a bay leaf.

1. Use button chanterelles if possible. Clean carefully. Keep small mushrooms whole; cut larger ones in half or quarters.

2. Heat a deep sauté pan over medium without oil or butter. Add chanterelles and stir immediately, continuing to stir at an easy pace until the mushrooms begin to release their water. Increase the heat to high and continue to stir until most of the water has evaporated. Sprinkle a healthy pinch of salt over the chanterelles and reduce heat again to medium.

3. Add vinegar, water, salt, sugar, and pickling spices. Simmer 5 minutes.

4. Use a slotted spoon to pack mushrooms into sterilized jars. Pour liquid and spices over to cover, with a quarter-inch of head room. Top off with more vinegar if necessary.

5. Seal jars and process in a hot water bath for 15 minutes.

Of Grays and Greenies

The first day I visited the burn, in early June, there wasn’t a car in sight. The fire had burned right down to the logging road and a trailhead was marked off with police tape. Signs warned of falling trees and other dangers. We could see the morels before getting out of the car.

Over the next week or two a few other pickers trickled in. To the south, a large, well-publicized burn was taking all the pressure—though I knew it couldn’t last. By the time this smaller patch was on the radar, I’d dried enough morels for several winters and many holiday gifts. After a few weeks of staying away, I went back the other day. Again, not a car in sight. The conica morels were long gone for the season.

But not the grays. While the morel season is winding down in Washington State (some years, with enough summer rain, you can pick burn morels well into fall in the Northwest), the last of the burn morels are fruiting in limited numbers at the higher elevations. Conditions might be different up in British Columbia.

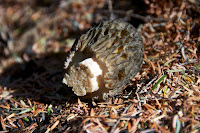
Just the same, the last act is a good one. Finding clusters of big grays always makes my heart skip a beat. The gray morel (Morchella tomentosa) is the easiest of the many burn morels to identify. In its youth it has a distinctly gray cap that’s densely pitted, and unlike other species it also has a dark stem with a nearly rubbery texture. Under a microscope you can see lots of little hairs at the base of the stem, hence its other common name, fuzzy-foot. Grays can be quite large, and mature specimens seem to have two color phases, gray and light yellow, for reasons that are not entirely clear. Commercial pickers sometimes call the big yellow ones blonds, not to be confused with the mountain blond (Morchella frustrata).

The photo at top shows a pod of mature grays, each of them several inches tall. Notice how the stems appear white at this stage, in contrast to the dark stems of younger grays. As these morels age, the stems lose their gray exterior and the ridges on the cap become sharp and brittle. As little bits of the ridges crumble off, the cap takes on a speckled look. Now look at these younger, smaller specimens below.

The shape and coloration is variable. Of the nine in this picture, all but one still have dark outer stems that contrast noticeably with the inner white where they’ve been cut. The pits on the smallest are elongated and barely open. A few of these, particularly those three on the right, appear to be maturing into the blond form.

Grays often command a slightly higher price in the market place because of their beauty and meatiness, even if their flavor is mild compared to other species.

I also found a few greenies, or pickles, the other day. At first I wasn’t sure what species these were, but Jeremy Faber of Foraged and Found Edibles confirmed them as greenies based on these photos.
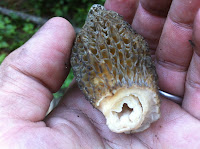
Notice the multi-layered stem when cut (at right). Sometimes the stem is so thick it appears solid, as seen in the photo at lower left. To my eye, these morels look quite a bit different from the greenies I saw in the Yukon two years ago, which were considerably larger and darker, with noticeably dense pitting like gray morels. Faber suggested that the lack of moisture this season has prevented this variety from attaining its usual size and coloration. They were scattered in the burn mostly as singletons, with perhaps a dozen in all making it into my bucket.
Some mycologists dispute the existence of greenies, considering them just another form of typical burn morel known in the industry as conica, of which there are probably several hard-to-separate species that require microscopic study and DNA analysis for identification. Still, the greenie familiar to commercial pickers has its own distinct appearance and it’s always the last to show in the burn, if it shows at all. The species that it seems to come closest to in the recent taxonomic reclassification of morels is Morchella capitata, but I wonder whether it’s in fact a species that has yet to be described by science. No doubt the mystery surrounding greenies will be unraveled in coming years as morel classification continues to be a hot topic among mycologists.

So, what about the taste? Unfortunately there wasn’t a conica in sight the other day, and the non-burn morels have been done in my habitat since mid-June. That leaves grays and greenies to duke it out. Most western morel enthusiasts rank the non-burn “natural” black morel as the tastiest, with conica next. Mountain blonds, though beautiful, tend to lack strong flavor, and the early season logging morels are generally derided as unsightly. And those late-flushing burn morels?

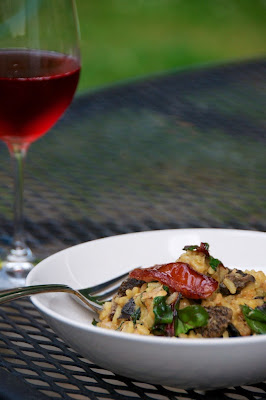
I put two grays and two greenies head to head in a summer burn morel taste-off. They got simply sautéed side by side in butter, with a sprinkling of salt. The grays, it must be said, had tremendous texture: meaty, chewy, crisp on the outside. The greenies, however, get the nod for taste. I won’t bore you by waxing grandiloquent like a wine snob. The bottom line is that I was reminded yet again that morels don’t really taste all that much like mushrooms; they taste like something that hasn’t been named yet—a mixture of meat and fungus that pleases the palate with its burst of umami. And for this reason, they made an excellent accompaniment to my first beach-caught salmon of the season, in a summer risotto, along with chard and tomatoes from the garden.
Vanilla Leaf Tea


IF YOU HAVE spent even a little time wandering lower and mid-elevation trails in the Pacific Northwest, you’ve seen vanilla leaf (Achlys triphylla), a common native plant that can grow in lush, luxuriant carpets of jaunty green on the forest floor.


When you find a good dense patch, it doesn’t take long to collect enough for a year’s supply of tea. Just grab the young leaves in bunches and snip the stalks with kitchen shears. When you get home, you can trim the rest of the stem if you prefer.

Native Americans used vanilla leaf as an insect repellent and to perfume their homes. Once in the dehydrator, the plant’s common name rings true: the room fills with the slightly sweet and calming aroma of vanilla. As a tea, it has the same affect. It’s laid back, with a reserved herbally essence that’s mellowed by the hint of vanilla. Really, it’s a wonderfully soothing tea, like a chamomile. You can adjust the flavor to suit your own taste by mixing in other wild ingredients such as rose hips.

Quick Asian Pickled Fiddleheads

THIS IS A SIMPLE way to put up lady fern fiddleheads.

I’ve used other pickling recipes in the past, but this is my new favorite for its ease, texture (i.e. crunch), and a perfect balance between salt and sweet.

One of the benefits of the quick pickle method is that the fiddleheads aren’t subjected to a withering hot water bath. The obvious downside is that this is a refrigerator pickle and you can’t keep them in the cupboard.

2 packed cups fiddleheads, cleaned
1 cup rice vinegar
1 tsp salt
1/2 tsp sugar
2 half-pint jars

A note on cleaning fiddleheads: It’s imperative that you remove as much of the brown, hairy, and bitter-tasting sheath that adorns the fiddlehead as possible. The easiest way to do this is to immerse them in a bowl of water and then rub each fiddlehead with thumb and forefinger to clean. Neatly trim the ends afterward.

1. In a pot of salted water, parboil cleaned fiddleheads for 30 seconds. Drain and shock in cold water before draining again and removing to paper towels.

2. Mix pickling brine of rice vinegar, salt, and sugar. You can omit the salt and sugar by using pre-seasoned rice vinegar, or experiment to taste.

3. Pack 2 half-pint jars with fiddleheads and cover with pickling brine. Refrigerate overnight.

Salal Preserves


SALAL, ALONG WITH the tree that it often associates, Douglas fir, is one of the most iconic plants of the Pacific Northwest.

The binomial is Gaultheria shallon and t’s a member of the heath family, Ericaceae. I was surprised to learn that the so-called berries are not technically berries at all—they’re swollen sepals. The leaves are edible, too, and were used by Native Americans. Salal’s main economic use today is for floral displays.
 * * *
.

Not quite jelly and not quite jam, this is more like a salal spread. I used a limited amount of sugar to retain the salal flavor and tartness. It will be perfect for breakfast scones and dinner cheese plates.

8 cups salal berries
2 cups water
4 tbsp lemon juice, divided
1 cup sugar
1/2 pouch liquid pectin

1. Simmer the berries, water, and 2 tablespoons of lemon juice for several minutes. Mash with a potato masher. Strain through fine-mesh seive and/or cheesecloth. My yield was 3 cups.

2. Return strained berry juice to pot. Add sugar, 2 more tablespoons of lemon juice, and pectin. Bring to boil.

3. Pour into sterilized jars. Secure lids and process 10 minutes in hot water bath.

My yield was 4 half-pint jars.

Pickled Kelp

WHILE CAMPING at Deception Pass State Park, we came across a six-foot long strand of bull whip kelp (Nereocyctis luetkeana) that had washed ashore. The kelp was still in good shape, so we bagged it up and took it home.

Healthy kelp forests are the old-growth stands of the ocean. A hundred feet or more in length from sea floor to surface, they support a diversity of life. I’ve seen this diversity first-hand while free-diving in Puget Sound. Lingcod, greenling, and rockfish forage among the kelp forests; sea otters, seals, and other critters seek refuge from predators; and countless invertebrates make their homes there.

Our find immediately put me in mind of Jennifer Hahn’s Pacific Feast: A Cook’s Guide to West Coast Foraging and Cuisine. Sure enough, when we got home I thumbed through my copy and found this recipe for pickled kelp. Imagine a typical bread-and-butter pickle, with its crunch and spicy sweetness, and add to it a subtle hint of the sea. After tasting these pickles, you’ll look at a seaweed-strewn beach in a whole new way.

I cut Jennifer’s recipe in half since my strand of kelp was on the small side, and I probably could have cut it in half again.

2 cups kelp rings
1 1/2 cups white vinegar
1 clove garlic, diced
1 1/2 tbsp pickling spice
2 tsp turmeric
1 1/2 cups white sugar
1/2 red onion, cut in crescents

1. Make the brine. Mix vinegar, garlic, spices, and white sugar in a sauce pan. Set aside.
2. Cut the kelp into foot-long sections. Peel each section with a potato peeler.
3. Slice each peeled section into 1/4-inch rings.
4. Add the kelp rings into the brine and set aside for 2 hours, stirring occasionally.
5. After brining for 2 hours, boil contents for 5 minutes.
6. Spoon kelp rings and juice into canning jars and process in hot water bath for 10 minutes.

The pickles cure in three weeks, although we couldn’t wait; after just a week in the jar they tasted darn good and brought back fine memories of a sunny long weekend at the beach.

Note: check state and local regulations before harvesting seaweeds. In Washington it’s only legal to harvest beached bull whip kelp; cutting a living kelp stipe is illegal.