Category Archives: putting up

Rose Hip Jelly

I’VE NEVER SEEN as many wild rose hips as I saw in the upper Skeena watershed of British Columbia this fall. I was there to fish for steelhead and I suppose I might have earned a few raised eyebrows if I’d put down my rod and spent more time picking hips, but when opportunity knocked I made sure to fill a bag. 

A rose hip is the seed pod of the rose, and nearly as attractive as the flower it replaces. It’s famously loaded with vitamin C. Last year I made rose hip syrup. This year, jelly.

I used less sugar than many recipes call for because I like the tanginess of the hips. I chose jelly for the warm, diaphanous color, because it was easiest, and I was short on time, but a marmalade-like jam would be a good choice too.

Double this recipe for a better time-to-output ratio.

6 cups rose hips
4 cups water
2 1/2 cups sugar
1/2 packet pectin
1/3 cup lemon juice (1 lemon)
3 to 4 8-oz canning jars
 

1. Wash and stem the rose hips, then cover with water (4 cups in this case) in a stainless steel pot and simmer for an hour or so until the hips are soft and easily mashed with a potato masher.

2. Strain the liquid. A jelly bag is ideal, but a combination of strainers and cheese cloth will get the job done. I used a food mill for the first pass and then lined a fine mesh strainer with a double layer of cheese cloth. After the liquid passed through I balled up the remaining mash and squeezed out the juice. The point is to extract as much juice and as little pulp as possible. This yielded 2 cups of juice.

3.  Return juice to pot. Add lemon juice and pectin and bring to a boil. Add sugar and continue to boil for a minute or so while stirring. Remove from heat, skim off any foam, and immediately ladle into sterilized jars.

4. Secure lids and process jars in hot bath for 10 minutes.

Oregon-grape Preserves

The state flower of Oregon looks like holly and grows throughout much of Cascadia. Anyone who spends time in the woods from Northern California up through British Columbia is familiar with its prickly green leaves, bright yellow blooms, and the tart berries that form in clusters in summer. It’s not exactly trail food. Pick a few berries on a hike and you’ll experience a lip-puckering flavor that gives new meaning to the term sour grapes. But tame it with sugar and you’ve got a whole realm of culinary possibilities.

Oregon-grape is not a true grape. Though its dark blue berries hang in grape-like clusters, that’s where the comparison ends. Members of the family Berberidaceae, the various species of Oregon-grape are also known for their medicinal qualities. The two species commonly encountered in the forests of the Pacific Northwest are the tall Oregon-grape (Mahonia aquifolium) and low Oregon-grape (Mahonia nervosa). Some botanists consider them part of the Berberis genus, which includes a variety of species commonly called barberries and which are renowned for containing berberine, a compound with cancer-fighting and anti-depressant properties, among other medicinal benefits.

To make Oregon-grape preserves wear gloves and harvest a good quantity of the berries. I picked five pounds or so from a patch behind my daughter’s pre-K, right in the center of Seattle. Use containers and utensils that won’t stain. Wash the berries and remove any large stems or other leafy debris. Put the berries in a pot and add just enough water so that the berries are barely covered. Boil for 15 minutes until soft, then run through a food-mill in batches. The food-mill should separate the juice and pulp from the skins and seeds.

Now you have a choice: You can further strain the juice from the pulp by using cheese cloth or a fine mesh strainer, or you can leave the pulp in to make a preserve more aptly called a spread. Next measure your juice. I had a scant 5 cups. In general you’ll want to add an equivalent amount of sugar, give or take depending on your taste. Try mixing in other fruits or berries, too, or even ginger. Bring your juice to a boil and stir in the optional lemon juice and pectin. I used about half of a 1.75 oz package. Next add the sugar, not all at once but slowly, tasting as you go until reaching your preferred balance between tart and sweet. Bring to a boil again, stirring thoroughly, and cook for a few minutes, then remove from heat and immediately ladle into sterilized jars. Process in a hot water bath for 10 minutes.

My measurements:

5 cups Oregon-grape juice and pulp
4 1/2 cups sugar
juice of 1 lemon (optional)
1 oz pectin

Yield: 3 1/2 pints

While Oregon-grape preserves look and taste a lot like your standard grape jelly, the flavor is more complex and full-bodied, with a sweetness that will please children and a tart edge suitable to a grown-up palate. I think it makes a terrific PB&J yet a dollop is equally at home on a fancy cheese plate.

Dandelion Jelly

DANDY JELLY? The flavor is really quite wonderful. It’s kind of like a gelified honey, and gives one a better idea of why those bumblebees look so drunk and happy while buzzing through a field of dandelions. 

Here’s the recipe, with the caveat that your mileage may vary. Don’t forget: pectin is your friend when it comes to Dandelion Jelly.

2 cups dandelion petals
2 cups water
1 cup sugar
2 tsp lemon juice
2-4 tsp pectin*

* Maybe more, maybe less. This jelly operates on principles beyond our ken.

1. Bring 2 cups water to boil and add dandelions. Boil 10 minutes over medium heat.
2. Strain dandelions and return liquid to pot.
3. Add sugar, lemon, and pectin, then bring to boil again before reducing heat to a simmer. Stir with wooden spoon until syrupy. This may take little time or lots of time, depending.
4. Pour into sterilized jars, seal, and process in hot water bath for 10 minutes.

Yields about a pint.

Nettle Pesto Pops


I found a frozen packet of nettles from last year’s harvest in the freezer the other day. With all the fresh nettles we’ve been eating lately this seemed like an opportune time to see how a year-old hunk of frozen nettles tasted in comparison. I’m happy to report my dinner companions up the street didn’t blink. Not for a second did they wonder whether my potluck contribution of Cream of Stinging Nettle Soup wasn’t made from nettles picked that day (and I didn’t tell—shhhh). The day-glo green color and signature flavor would have fooled me too.

Score another point for free, nutritious food.

Speaking of frozen nettles, I wouldn’t have been able to make a soup with fresh nettles anyway because all of my harvest has gone into pesto production. There’s a reason for this. She’s four going on fourteen, cute as a button when she’s not terrorizing her parents or building elaborate homes for ponies and princesses out of the furniture, and she loves her daddy’s nettle pesto.

I’ve already posted a recipe for Stinging Nettle Pesto, but here’s more info/photos about putting up your pesto. Use a Ziploc with a corner cut off to fill each cavity of the tray, then put in the freezer for several hours. Once frozen the pesto cubes can be easily removed from the tray and stored in freezer bags, ready for use throughout the year.

Whenever Ruby wants her pesto fix, I simply grab a pesto pop from the freezer, heat it up in the microwave, and toss with a bowl of cooked pasta. A single cube is enough to coat a few servings of pasta.

If you want to make a large batch of nettle pesto just remember to harvest enough nettles. A grocery bag packed with freshly harvested stinging nettles yields about two ice trays of pesto plus a small tub.

Few meals are healthier or easier to make.

Truffling with Jack

As I lay me down here at home, cold-turkey off the meds, there’s not much to report in the way of foraging. Luckily I have my wild food stash and a few things to mention that didn’t get mentioned in the fall.

A few months ago while in Portland for some book events I made a side-trip an hour southwest to the Willamette Valley in search of a coveted wild edible to bring back home. It’s the sort of edible that inspires otherwise circumspect men to spend stupid sums of money and otherwise intelligent women to sleep with stupid men. At least in Europe that’s the case, where the truffle has enjoyed a long, colorful history as a pricey luxury item and sought-after aphrodisiac.

Truffles are subterranean fungi, many of which emit pungent scents to attract the animals that will dig them up, eat them, and subsequently spread their reproductive spores. Whether or not these aromas are ever scientifically proven to heighten arousal we can be sure that truffles will continue to fetch top dollar for their culinary uses. The white “Alba” truffles of Italy and black “Perigord” truffles of France have been the choice of royalty for centuries. Here in North America, specifically in the low-elevation Douglas-fir forests of the Pacific Northwest, we have our own edible truffles that don’t require a fancy coat-of-arms or family escutcheon to possess. While not as renowned as their European counterparts, American truffles can stir the same primal passions when used correctly.

And there’s the rub. The fact is, most American diners—most American chefs, one could argue—don’t know what a good truffle tastes like, or worse (in the case of the chefs), they aren’t scrupulous enough to know when to not serve the expensive fungus mocking them in the walk-in. In this country unripe truffles are routinely bought and sold and then passed up the food-chain until they reach restaurant patrons who scratch their heads wondering what all the fuss is about. I’ve been served a very unspectacular Perigord black truffle by one of Seattle’s finest restaurants, with the flourish of a waiter brandishing his mandoline at table. The theatric gesture didn’t change the fact that the truffle wasn’t ripe.

American truffles seem to suffer even more from ill-use, perhaps because they’re cheaper and easier to obtain. A small group of local truffle boosters has been trying to change this, but until the public is more educated—from commercial forager to diner—our home-grown truffles will continue to be viewed as vastly inferior to their European cousins. Which is too bad, because good, ripe truffles from both continents can elevate a meal from excellent to sublime.

As I drove southwest from Portland, I thought about my last meal of truffles. It had been just a few days earlier in San Francisco’s North Beach neighborhood, where a friend took me to his favorite trattoria. We ordered plates of linguini with cream sauce. The waiter appeared with a scale and a large white Alba truffle, which he weighed first, then shaved onto our pasta, then weighed again. Like cocaine, truffles are priced by the gram. Fortunately this truffle that had traveled thousands of miles was in top form and our meal, so simple in appearance, was superb. The smell of the truffles rose up in the steam of the dish. Each bite seemed to offer the possibility of a secret revealed. We took in these ineffable pleasures and washed them down with woodsy Piedmontese Barbera…
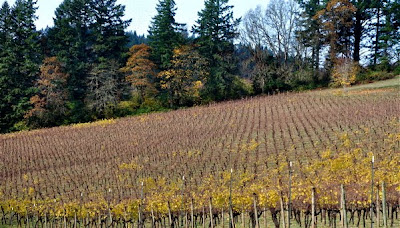
Autumn colors in neat geometric patterns across the Dundee Hills snapped me out of my reverie. I wasn’t in Italy, nor San Francisco. Here in the Willamette Valley the crush of Pinot Noir and Chardonnay had finished and the leaves were turning pretty shades of yellow and orange. In the town of Dayton I pulled into the historic Joel Palmer House to meet my guide.

Jack Czarnecki, former owner of the Joel Palmer House (his son is now the chef-owner), is about the closest thing this country has to a truffle expert, and he’s using his expertise to produce truffle oil. Like the proverbial lightning in a bottle, truffle oil is a way to capture the fleeting flavors of truffles and use them year-round; unlike lightning in a bottle, it can really be done. But it should be noted that Jack’s all-natural truffle oils are a far cry from the chemical concoctions devised in scientific labs by most of the other so-called truffle oil manufacturers.
A few words about truffle oil. As wild foods, in particular fungi, continue to land on plates served by high-end restaurants across the land, there’s been a commensurate increase in the use of truffle oil. Truffle oil is the sort of fancy ingredient that can spruce up a menu and lend extra gravitas to an establishment looking for culinary plaudits. Which would you pay more for? Wild Mushroom Ravioli or Ravioli of Porcini and Chevre drizzled with Truffle Oil… But what is truffle oil? According to Daniel Patterson in his now-infamous New York Times rant, most truffle oils are a fraud—molecular creations that don’t actually have a shred of truffle in their recipes.

You see, the truffle’s complex aroma has been sequenced out by chemists so that it’s now just a series of numbers and letters, an equation. Even the French and Italian oils are guilty of the deception, and though some will include shavings or pieces of truffle in the bottom of the bottle for an implied authenticity, the actual flavor has been created in a test tube.

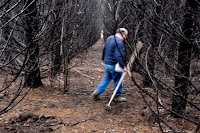
Jack hasn’t taken the short cut. His truffle oils are the real deal. And for this reason, he needs to forage an enormous quantity of truffles each season. I was only too glad to help. With his friend Tony joining us, we set out for the truffle ballpark—in this case, a managed stand of young Douglas firs on private property where Jack has worked out a barter arrangement that is typical between truffle hunters and landowners. To the untrained eye the forest looked like a rather uninviting monocrop. To the experienced truffler, it looked like the strike zone: young, single-aged conifers grew in rows for easy walking and a thick carpet of duff covered the ground underfoot. Using garden rakes, we gently raked back the layer of duff to expose little white tubers up to the size of golf-balls: Oregon winter white truffles, Tuber oregonense.

It was still a couple weeks early and most of the truffles didn’t yet have their typically pungent smell. We collected them just the same. Jack explained that it was possible to ripen the truffles if done with patience and an understanding of the truffle’s life-cycle.

I came home with a couple pounds of white truffles. Following Jack’s instructions, I washed the dirt off each truffle with a quick blast of tap water and then used a toothbrush to clean the exterior. This took some time. Then I swaddled the truffles in paper towels, layering them in Tupperware and sealing the lid before popping into the fridge. The idea is to keep them cool and dry so they can ripen just as they would in the ground. The truffles sweat so you need to change the damp towels every couple days.

Most of a truffle’s flavor and aroma comes in the form of gases emitted by the truffle which can then be absorbed in fats. This is why you never cook truffles at high temperature; the fragile gases get cooked out. The best way to serve truffles is to shave them thinly over hot food on the plate, not in the pan, and allow the flavors to soak in. Scrambled eggs, melted butter, and cream sauces are the perfect vehicles.

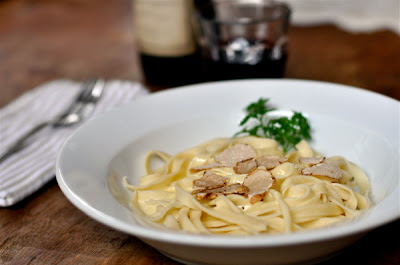
Unfortunately most of my individual truffles never ripened as much as they would have in the ground. My ripest specimens got thinly sliced into dishes such as homemade Tagliatelle with Alfredo Sauce to which they added a noticeable hint of truffle, though not as much as I would have preferred. But I had another card up my sleeve: I made a couple pounds of truffled butter, a better choice for my slow-ripening truffles. I sealed sticks of organic sweet cream butter into Tupperware with a few ounces of truffles per stick and left them in the fridge for a few weeks. By the end the truffles were decomposing, but over the course of those weeks they emitted enough of their fabled gases to flavor the butter. (Oh, and by the way, if you ever see truffled butter that’s shot through with pieces of ground-up truffle, know that this is either a misconception on the maker’s part or a gimmick. It’s all about the gases.) The truffled butter is wonderful melted over pasta or simply spread on toast.

This was my first experience digging white truffles. In general I’d say they’re stronger than black truffles. Black truffles have a distinctly different flavor (fruitier, less garlicky) and are supposedly harder to find, though I’ve had some luck foraging them in recent years. Both whites and blacks can make a special accompaniment to a meal when properly ripe, and whether or not our local truffles deserve comparison with European varieties is besides the point. Truffles are a treat wherever they are handled with skill.
Sichuan Pickled Sparassis


CAULIFLOWER MUSHROOMS (Sparassis sp.) are deliciously nutty and they can be huge, with a firm texture that doesn’t soften with cooking like so many other species. Even after braising in a stew for an hour they remain al dente, which is a good way to describe the texture since this mushroom resembles nothing so much as a bowl full of cooked egg noodles.

Those wavy protrusions and deep clefts are expert at trapping duff and forest debris, making the cauliflower one of the more difficult mushrooms to clean. Worms like them too. The trick, as with so many tasty mushrooms, is to find them before the insects do—or else cut away the infestations as best as possible.

Sichuan peppercorns are the key ingredient. Not really pepper, the spice is actually the husk of a type of berry widespread through Asia. When consumed, it gives the mouth and lips a numb tingling feeling that works well with other hot spices commonly found in Sichuan foods.

1 lb cauliflower mushroom, boiled for a few minutes and cut into pieces
1 lb Napa cabbage, pulled apart and cut into 2-inch squares
1/2 lb diakon radish, sliced into 1/4-inch thick half-moons or matchsticks
2 carrots, sliced on an angle into 1/4-inch thick ovals
6-8 hot peppers cut in half and de-seeded
1/4 cup sliced ginger
2 tbsp Szechuan peppercorns
2 tbsp vodka
6-8 cups water, boiled and cooled
3 tbsp salt

Mix the brine and Szechuan peppercorns in a large tupperware or other non-reactive container. Stir in vodka; this is strictly for sanitary reasons. Add vegetables, fungi, and spices, making sure they are immersed completely in the brine. Cover and store at room temperature for 3-5 days. After the initial pickling, the contents can be refrigerated for 2 weeks.

Pickled Porcini


IF YOU WANT TO pick mountain porcini in the Cascades, you best keep your ear to the wall. No one casually gives up their patches. It’s hard enough to predict where and when the buggers will fruit as it is.

A couple weeks ago while picking huckleberries I got a tip from some hikers that a lot of mushrooms were fruiting to the south. The next day made an educated guess about where to go. Mountain porcini like high elevations, and they’re picky about tree composition. True firs and spruce are the ticket. After a three-mile hike I started to see them—first some blown-out flags in the sunny areas and then fetching number one buttons emerging out of the duff in more shaded spots.

When picking porcini, always make sure to field dress them right away. I trim the end to check for worm holes, then cut the mushroom in half. Often a pristine looking bolete will show signs of bugs once you slice it open, but the infestations will just as often be local to a small area of the cap or stem that can be trimmed away. Whatever you do, don’t simply put a porcino in your basket to trim later at home. I’ve learned the hard way that a basketful of beautiful buttons can be a worm-ridden mess by the time you get home if you don’t deal with the bugs immediately.

By the end of the day I had nearly ten pounds of mostly perfect porcini buttons (having thrown away twice that amount as too far gone). What a dilemma! I had more porcini than I could use. Some I cooked, some I gave away, and the rest got pickled.

Pickled Porcini

My friend Cora, who stars in the morel hunting chapter of Fat of the Land the book, passed this recipe along to me from his father’s cousin, who lives in Cortemiglia, Italy. She gathers twenty to fifty pounds of porcini annually, so putting up is a must. 

1 pound fresh porcini buttons, halved or quartered
1 cup white vinegar
1 cup water
salt
olive oil
2 lemon peels per jar
2 dried red chili peppers per jar
1/2 tsp peppercorns per jar
(optional) other fresh herbs and spices such as thyme or oregano

1. Clean and cut up porcini buttons, then spread on a baking sheet. Cover generously with salt and set aside for at least an hour, until the mushrooms have shed much of their water. Drain and lightly rinse under tap in a colander.

2. Bring vinegar and water to boil. There should be enough liquid to cover mushrooms. Increase amounts for larger batches, keeping the ratio of vinegar to water at 1:1. Simmer porcini for 2 – 3 minutes. Drain on paper towels and set aside to dry for a few hours.

3. Pack sterilized jars with porcini, lemon peels, chili peppers, and peppercorns, then fill with olive oil (try both extra virgin and light olive oils to determine taste preference). Keep refrigerated.

Pickled Sea Beans

SEA BEANS (Salicornia sp.) are known by many names: beach asparagus, glasswort, pickleweed, samphire. They’re a succulent, salt-tolerant plant that grows along beaches, marshes, and mangroves around the world. In my region we find sea beans near the high tide mark along sandy or pebbly Puget Sound beaches.

Fresh, they make a crunchy seaside snack, and they retain that pleasing texture even after cooking. The flavor,  is subtle, a salty taste of the sea with a hint of wild green. I like sauteed sea beans mostly for the texture, the bright color, and the salt, as in oyster succotash.

Sea beans also make a colorful garnish. Pickling them means you can have sea beans whenever inspiration strikes. 

Spicy Pickled Sea Beans

For the Southwest version I adapted a fairly standard pickling recipe for spicy green beans:

4 handfuls sea beans
4 red chiles
6 garlic cloves
pinch peppercorns per jar
pinch coriander seeds per jar
pinch mustard seeds per jar
4 sprigs fresh dill
1 1/4 cup water
1 1/4 cup white wine vinegar

1. Sterilize jars and lids in boiling water.

2. When jars are cool enough to handle, add pinches of coriander, mustard, and peppercorns. Pack half full with sea beans. Insert chiles, garlic cloves, and dill around outside edges. Finish packing with sea beans.

3. Bring water and vinegar to a boil. Ladle over the sea beans leaving about 1/2-inch head space. Wipe jar edge clean and screw on sterilized lids.

4. Process in a boiling water bath for 10 minutes. Remove and allow to cool completely at room temperature. Check lids for proper seal. Store for at least one month before using to allow flavors to develop.

Yields 2 pints.

Asian Pickled Sea Beans

sea beans
rice vinegar
1 tbsp sugar per cup of vinegar
3 1-inch slices ginger per jar
1 star anise per jar

Figure on using at least 1 cup of vinegar for 2 half-pint jars. Oh, and rice vinegar and rice wine vinegar are essentially the same thing, in case you were wondering.

1. Sterilize jars and lids in boiling water.

2. When jars are cool enough to handle, pack with sea beans. Insert ginger slices around edges and a single star anise at top.

3. Bring rice vinegar and sugar to a boil. Ladle over the sea beans leaving about 1/2-inch head space. Wipe jar edge clean and screw on sterilized lids.

4. Process in a boiling water bath for 10 minutes. Remove and allow to cool completely at room temperature. Check lids for proper seal. Store for at least a few days before using to allow flavors to develop.

Word of warning: If you don’t own a dedicated canner with a rack (i.e. you use a big ‘ol pot instead, like me) be very careful with your jars to avoid breakage. I discovered this the hard way. Because the contents of the jars—the sea beans—are packed cold, your jars can experience a terrible fate called thermal shock and pop their bottoms off. Not pleasant. Keep the jars in the hot sterilization water until ready, pack them, don’t overscrew the lids (you know what I mean), then place carefully in the pot before bringing to a boil. In restaurant/software speak, this is called a “soft launch.”

And don’t forget to use any leftover sea beans post-pickling. They make a salty garnish, or you can saute them in butter and garlic with a drizzle of lemon juice for a side dish. To leech out some of the salt, try blanching and shocking in two changes of water.

Porcini Every Day

Eating fresh porcini is a treat, but you can experience the earthy goodness of bolete mushrooms throughout the year by drying some of your catch. If you’ve ever paid for a 1 oz package of dried porcini at the market then you know drying your own makes economical sense too.

For us West Coasters, spring porcini makes a case for drying because it’s abundant and it’s often wormy. Rather than tossing the wormy ones, I slice up those that aren’t too badly infested and cut away the parts riddled with holes. Any worms I miss will usually exit once they realize the gig’s up, and those that don’t, being mostly water, evaporate into nothingness during the drying process. Besides, most of my dried porcini gets pulverized in a blender for use in stocks and sauces, so I’m not too concerned about a few pinpricks of worm dust; we eat more insects in our salads.

Drying Porcini, Step by Step

1. Slice mushrooms into 1/4 inch thickness. Discard badly wormed out bits.

2. An electric food dehydrator is best for drying but there are alternatives. You can arrange the mushroom slices in a single layer on screen. I use an old window screen scavenged just for this purpose. Prop up the screen at the corners with books if necessary to increase airflow underneath. Place screen and mushrooms in a sunny room or outside and blast them with a portable fan. Depending on your climate, this may take a few days. Alternatively, you can place on a pan in an oven on low heat and leave the door open for air circulation; I’ve never tried this technique but others claim it works. A food dehydrator is best.

3. Very important. Make sure every last mushroom slice is thoroughly dried. Some pieces will snap in half; others will be bendy but if you rip in two the inside shouldn’t be at all moist. A single undried piece can spoil an entire batch with mold. On the other hand, don’t overdry or you’ll leach out the good flavor oils.

4. Store dried porcini carefully. My main foe is the indestructible kitchen moth, so I keep my porcini in glass mason jars with rubber-gasket lids that lock down. Insect pests can get into ziplock bags.

Like a fine wine, the longer you age your porcini, the more the earthy essence will be concentrated. But don’t wait too long! Like wine, dried porcini can spoil eventually. I try to use mine within five years or so.

Now you’ve got a taste of the woods to enjoy year-round. Reconstitute a handful of pieces for a pasta sauce, or pulverize and add to your favorite beef stock for an extra boost. I use dried porcini in any number of dishes, from Oxtail Gnocchi to Braised Chicken to Chanterelle Soup.

Speaking of bolete worms, this time around I noticed an interesting phenomenon. I used six books to prop up two screens side by side. One of the books, Bill Buford’s Heat appropriately enough, has a bright yellow dust jacket. The worms that crawled out of the mushrooms during the drying process all migrated to this colorful cover where they made their last stand in the sun. None of the other books exhibited evidence of worms. In fact, I’ve never actually seen worms escaping off their host mushrooms before, it’s just something I assumed happened under the cover of darkness. It’s as if they all made a break for the yellow book, thinking it salvation. Is this because the gills of old boletes are yellow? I have no idea, but I’ll be using Heat again.

Stinging Nettle Pesto

I FORAGE ENOUGH nettles every spring to enjoy them year-round. My favorite way to preserve them is nettle pesto.

Because stinging nettles must be boiled briefly to neutralize the sting—unlike basil—my advice is to use a food processor. Once boiled and drained, they’re a soggy mess; a food processor remedies this sorry state without messing with that splendid day-glo green color.

2 cups stinging nettles, blanched and chopped (figure 6 cups raw)
1/2 cup Parmesan
1/2 cup pine nuts, roasted
4-5 large garlic cloves, peeled
1/2 cup olive oil, plus more to taste
1 tbsp lemon juice, plus  more to taste
salt and pepper, to taste

1. Blanche nettles for a minute in boiling water. Remove to a salad spinner and shake off excess water, then ball up your nettles and give one good squeeze to wring out more water. It’s tough to watch all that dark green, nutrient-laden liquid vanish down the drain, but you’ll want olive oil lubricating your pesto, not water.

2. Add nettles to food processor, along with roasted pine nuts (or walnuts, if you prefer), grated parmesan, garlic cloves, lemon juice, and seasoning. Pour half of the olive oil in and…Whirrrr. Pour the rest of the oil in. Whir again, until your preferred consistency. That’s it.

This recipe makes a fairly pasty pesto; if you want something a little more spreadable for bread, sammiches, etc., try using more olive oil.

Next, think about putting up. You may want to fill a few small (e.g. 4 oz) tubs for the freezer for dinner party pasta, as well as an ice tray for smaller servings. To fill the tray, use a plastic Ziploc with a corner cut out and squeeze out a blob of pesto in each cavity, just like icing. Remove the pesto cubes from the tray once frozen and seal in a freezer bag; now you’ve got instant sauce to brighten a fillet of fish or piece of meat—or simply to spread on good homemade rosemary bread baked by your friend and neighbor, as we did.