Category Archives: recipes

Go for the Gold: Razor Clam Sushi Roll

THIS PAST SUNDAY I was faced with a tough choice: catch the last two periods of the gold-medal hockey game between the U.S. and Canada or go for the golden razor clam. I went for the gold. It’s almost always better to be a participant rather than an observer, don’t you think?

If you’ve spent any quality time in Jamaica, then rolling sushi ought to be second nature. If not, just practice. A bamboo roller makes it easier. How you cook the rice is key. Make sure you use sushi-grade short-grain rice and rinse it in a few changes of water before cooking. The rice should spread smoothly on a sheet of nori without becoming too gloppy.

While the rice is cooking, prep and arrange your ingredients. I’ve used all kinds of fish, fresh vegetables, Asian-style pickled vegetables, and other flavors and textures. The following are examples, but experiment on your own. Tempura is fun because it adds a little crunch to your sushi and a hit of that fatty goodness that only fried foods can give.

4-5 razor clams, cut in half lengthwise
tempura batter (here’s a recipe)
2 cups sushi rice
seasoned rice vinegar
1 package nori
Dungeness crabmeat or other fish or shellfish*
1 small jar tobiko
1/2 cucumber
1 avocado
pickled ginger
wasabi
soy sauce

* Note: As you can see from the photos, I used fake crab, known as surimi.

1. Make rice. When cooked, mix in a splash of seasoned rice vinegar to taste.

2. Peel and slice cucumber into matchsticks. Cut avocado into thin slices.

3. Batter razor clams and fry in oil. Remove to paper towels.

4. Spread rice evenly on nori wrapper. Repeatedly wetting fingers in a dipping bowl makes this easier.

5. Arrange ingredients and roll. For an inside-out roll, flip rice-covered wrapper onto wax paper, rice side down.

Itadakimas!

Nettle Gnocchi

TO RE-PHRASE an old saw, if the world gives you stinging nettles, make Nettle Gnocchi.

Whenever I make a potato-based gnocchi (as opposed to semolina-based) I’m always skeptical until the little pillows are safely plated and intact. So much can seemingly go wrong (though it usually works out).

Recipes for potato dumplings are more like guidelines. The important thing is to get a feel for the dough. I don’t think I’ve ever used the same amount of flour twice, and this is especially true when adding a wet ingredient such as boiled nettles to the mix. 

So think of the amounts below as estimates. I improvised on the same recipe as the one for Oxtail & Porcini Gnocchi. The best thing to do is start with less than the full cup of flour and then keep adding. You may end up using well over a cup as I did.

2 large Yukon Gold potatoes, boiled and peeled
1 egg, lightly beaten
1 cup nettles, boiled and chopped
1 cup or more flour
salt to taste

1. Boil nettles for a minute or two to neutralize sting. Remove to cold water. Next wring out excess water. Chop nettles, measure out a cup and then whir in a food processor.

2. Cut potatoes in half and boil in salted nettle water until tender, thirty minutes or more. Remove from water one at a time and peel. Break down potatoes with a fork and allow to cool. Make sure to attack lumps but don’t over-mash.

3. Mix nettles into potatoes by hand, a little at a time.

4. Sprinkle a handful of flour over your work space. Pull potato-nettle mixture into a mound on floured surface and make a volcano-like crater. Pour beaten egg into crater and sprinkle 3/4 of the flour over top. Start working the dough with metal spatulas or your hands, adding more flour and folding the dough into itself as you go. I find this step gets messy unless I make sure to use plenty of flour.

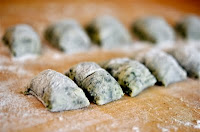
5. Split the dough into 5 or 6 balls. The dough is ready when you can easily roll out each ball into a long snake. Again, a work surface dusted generously with flour makes this easier. Now cut into pillows.

6. Add gnocchi to salted boiling water. (You can re-use your nettle-potato water.) When they float to the surface they’re done. Remove with a slotted spoon.

I ate my Nettle Gnocchi with two different sauces. A simple red sauce with grated parm works quite nicely, the acidity of the tomatoes marrying well with the high green note of the nettles.

But even better, in my opinion, is a sweet, herbed cream sauce. For this more decadent preparation, briefly sauté fresh chopped herbs (I used sage, thyme, rosemary, oregano, parsley, and chives) in butter, splashing with a little cognac that bubbles off (but not before leaving a pleasant sweetness), and finishing with heavy cream. Pour over the gnocchi and sprinkle with parmesan.

Huckleberry Buckle

PATIENCE IS NOT one of my virtues. This I know. I also know that I will probably never muster the patience required to be a good baker. 

And so, unless I change my ways, my occasional stabs at baking will almost always be less than earth-shattering. The numinous alchemy between sugar, butter, and flour will remain obscure to me. Hence, this nearly foolproof Buckle.

Batter:

1/2 cup shortening
3/4 cup sugar
1 egg
2 cups sifted all-purpose flour
2 1/2 tsp baking powder
1/4 tsp salt
1/2 cup milk

Topping:

2 cups huckleberries or blueberries *
1/2 cup sugar
1/2 cup sifted all-purpose flour
1/2 tsp ground cinnamon
1/4 cup butter

In large bowl cream shortening and 3/4 cup sugar. Add egg and beat until light. In separate bowl mix together flour, baking powder, and salt; add to creamed mixture along with milk. Spread in greased 11 X 7-inch pan. Top with berries. Mix 1/2 cup sugar, 1/2 cup flour, and cinnamon; cut in butter until crumbly. Sprinkle over berries. Bake at 350 degrees for 45 minutes or until done. Let cool for several minutes, then slice. Serve warm.

* We use two different techniques when using frozen berries. If the berries are frozen in a clump, we thaw and drain them; if individually frozen we add them to the batter without thawing.

Farro with Porcini, Chanterelles & Mascarpone

FARRO IS AN ancient form of hulled wheat that’s low-yielding and similar to barley or wheat-berries in texture. Despite being in vogue of late, farro is actually among the oldest of agricultural products. It was first domesticated nearly 10,000 years ago in the Near East, most likely in present-day Turkey. Today it is eaten more in Itlay than anywhere else.

This is a good way to show off this ancient grain. The farro is combined with sauteed wild mushrooms—chanterelles here—and a healthy dollop of mascarpone to give it a creamy unctuousness. It takes a while to cook but it’s forgiving. Add more water and cooking time if you prefer a softer, more yielding bite. You can also soak the grain overnight.

1 cup farro
3 cups warm water
1-2 oz dried porcini, pulverized (optional)
4 oz mascarpone
1/2 lb chanterelles, chopped
2 tbsp butter
1 clove garlic, minced
salt & pepper

1. Reconstitute the porcini in 3 cups of warm water. Set aside for 10 minutes.
2. Pour porcini water in pot, salt the water, and bring to boil. Add farro, lower heat to simmer and cook until water is gone, about 40 minutes. Farro should be al dente yet tender. You can add more or less water and cook until desired softness. There’s a lot of leeway and personal preference with farro.
3. Saute chanterelles for several minutes in butter in a large skillet, or in batches. Avoid slimy chanterelles by not crowding. You want the mushrooms to be lightly browned and firm.
4. Stir mascarpone into farro, then stir in most of chanterelles, reserving some as garnish. Season and garnish with chopped chives or parsley.

We served the farro with sauteed kale from the garden and sliced Steak au Poivre. The steak was organic and grass-fed, with a single 8-ounce New York strip plenty enough to feed two of us along with the other sides. A bottle of cabernet completed the meal.

Sichuan Pickled Sparassis


CAULIFLOWER MUSHROOMS (Sparassis sp.) are deliciously nutty and they can be huge, with a firm texture that doesn’t soften with cooking like so many other species. Even after braising in a stew for an hour they remain al dente, which is a good way to describe the texture since this mushroom resembles nothing so much as a bowl full of cooked egg noodles.

Those wavy protrusions and deep clefts are expert at trapping duff and forest debris, making the cauliflower one of the more difficult mushrooms to clean. Worms like them too. The trick, as with so many tasty mushrooms, is to find them before the insects do—or else cut away the infestations as best as possible.

Sichuan peppercorns are the key ingredient. Not really pepper, the spice is actually the husk of a type of berry widespread through Asia. When consumed, it gives the mouth and lips a numb tingling feeling that works well with other hot spices commonly found in Sichuan foods.

1 lb cauliflower mushroom, boiled for a few minutes and cut into pieces
1 lb Napa cabbage, pulled apart and cut into 2-inch squares
1/2 lb diakon radish, sliced into 1/4-inch thick half-moons or matchsticks
2 carrots, sliced on an angle into 1/4-inch thick ovals
6-8 hot peppers cut in half and de-seeded
1/4 cup sliced ginger
2 tbsp Szechuan peppercorns
2 tbsp vodka
6-8 cups water, boiled and cooled
3 tbsp salt

Mix the brine and Szechuan peppercorns in a large tupperware or other non-reactive container. Stir in vodka; this is strictly for sanitary reasons. Add vegetables, fungi, and spices, making sure they are immersed completely in the brine. Cover and store at room temperature for 3-5 days. After the initial pickling, the contents can be refrigerated for 2 weeks.

X-Country Double Lobster Risotto


THAT’S RIGHT, two kinds of lobsters from two different coasts, East meets West: A Maine lobster of the surf variety and a Washington lobster of the turf variety, combined in a Reece’s style mash-up for grown-up palettes. I gotta tell you, folks, this is a serious keeper, and I’m scratching my head wondering why I’ve never seen such a beast on a menu before because it makes so much sense.

Lobster mushrooms are named for their bright orange exterior that resembles the cooked crustacean—the colorful result of one fungus parasitizing another, with the hapless—and unpalatable—Russula brevipes being attacked and colonized by Hypomyces lactifluorum, resulting, incredibly, in a mushroom that is edible and choice.

The more I’ve cooked with lobsters over the last few years, the more I’ve begun to appreciate their versatility. They make a wonderful traditional duxelles sauce, and there’s no denying they have a hint of seafood taste that works especially well in certain dishes of the sea. Plus, their texture when cooked is firm yet soft and smooth. You could almost use them in a traditional Lobster Risotto and skip the crustacean altogether. But when used together, it’s like doubling your money.

2 Maine lobsters (each about 1 1/4 lbs)*
4 tbsp butter
1/2 lb lobster mushrooms, diced
1 large shallot, diced
1 celery rib, diced
1 clove garlic, minced
1/4 cup sherry
2 cups Arborio rice
8 cups stock**
1/4 cup grated Parmesan
2 tbsp chopped parsley and/or chives

* We used a single 1 1/2 lb lobster, which was enough for dinner for two. The leftovers, however, were mostly bereft of lobster.

** You can use chicken stock, fish stock, or make your own stock using the lobster shell(s), which is what we did. After cooking, remove lobster to cold water. Add to pot 1 cut up onion, 2 chopped carrots, 2 chopped celery ribs, and a bay leaf. Toss the lobster shells back into the pot as you finish cleaning them of their meat. Simmer, allowing stock to reduce, until ready to use, then strain.

1. Saute shallots, garlic, celery, and mushrooms in butter over medium-high heat. When the shallots are translucent, pour in the sherry and continue cooking until most of the alcohol has evaporated, then add the rice and stir to coat thoroughly, cooking another couple minutes.

2. Begin adding ladlefuls of warm stock in your preferred risotto style. I like this risotto creamy but not overly wet. Continue until the rice is cooked yet still al dente.

3. Meanwhile, chop up lobster meat to desired size, reserving large hunks of claw meat as garnish. When risotto is done, remove from heat and mix in Parmesan and lobster pieces. Sprinkle plated risotto with chopped herbs.

Serves 4. Pair with a medium to full-bodied white that isn’t too oaky. Our local shop recommended an Argiolas Vermentino di Sardegna Costamolino 2008, which the New York Times called their favorite as well as “Best Value” in a recent roundup of Italian vermentinos.

Chanties Chanties Everywhere


The chanterelle: Despite its romantic twirl off the tongue, you’d think it was practically domesticated—an off-the-shelf French floozy Halloween costume. Is there an A-list wild mushroom that gets less respect, after all, than the chanty? Like an over-exposed model, it has the faint whiff of “been there done that.” Well, I for one wouldn’t kick a golden chanterelle out of bed for eating Cheez-Its!

Their fruity nose of apricots is unique in the fungal kingdom, and that fruitiness carries over into taste. Though earthy like other wild mushrooms, the chanterelle’s flavor is reminiscent of orchards and vineyards and other more civilized habitats. In my neck of the woods they’re without a doubt the most common of the wild mushrooms, gracing even the shelves of the local Safeway.

But don’t be fooled. Though common, chanterelles are not always an easy find, and their singular flavor and aroma can transform many a dish from pedestrian to sublime, in particular any dish with bacon in it. Something about the union of fruity chanterelle with the essence of pig is a marriage made in culinary heaven.

How do you find chanterelles, you ask? I can’t speak for other parts of the country, but in the Pacific Northwest young stands of Douglas fir are your best bet. This means a trip to logging country, where you’ll pass miles of unsightly clearcuts before finding that perfect stand of 10 to 40-year-old tree farm Doug-firs where chanties thrive. This is not my favorite sort of mushroom hunting. The forest is dense, damp, and dark—and usually a boring monoculture. But if you can manage to find a patch of woods that hasn’t been visited by a commercial forager you’ll find the green moss carpeted with golden fungal goblets. These are the classic Pacific golden chanterelles, Cantharellus formosus. There are other varieties.

A strikingly hued species associated with spruce—Sitka on the coast and Engelmann in the inland West—goes by the name Cantharellus roseocanus. I find these chanterelles, known to commercial pickers as “peach chants” or “fluorescent chants,” in the high huckleberry meadows of the Cascades, where they hug the ground in a most unchanterelle-like demureness, their dullish yellow caps with a surprisingly flat topography peeking out of the duff. But slice one off at the ankles and turn it over and you’ll see the most blazing hue of neon orange underneath the cap.

And let’s not forget the humble white chanterelle (Cantharellus subalbidus), which is often less expensive at the market than its golden cousin yet is my favorite for its meatiness and strong flavor. White chanties hide beneath the duff, often requiring an eagle eye and careful excavation. The result is a chanterelle that is dirtier than its golden counterparts but worth the effort to root out and clean up.

Fig & Chanterelle Crostini

For this post I tried to stay away from heavy cream, an effort of Dr. Strangelove proportions. The photo at top is my favorite new canape, a simple dollop of chopped chanterelles sauteed with shallots and fresh sage in butter topped with a thin slice of fig and a sprinkle of parsley. Admittedly, I wasn’t too keen on the fig when a few of us first concocted this simple crostini; I thought the addition of fresh fig would take the fruitiness factor too far, but in fact it merely drives home the fact that chanterelles are a woodsy treat.

Chanties offer endless possibilities for brightening a meal with fall color and the tastes and smells of the harvest season. To borrow from Bull Durham, when you speak of the chanterelle, speak well.

Smoked Salmon

IT’S EASY TO get worked up over all the possibilities for smoked salmon.

My advice? Stick to basics. A simple dry brine of brown sugar, salt, pepper, and garlic is really all you need, 

4 cups dark brown sugar
1 cup pickling salt
1 head garlic cloves peeled & chopped
black pepper to taste

1. Mix the dry brine ingredients.

2. Generously cover each piece of salmon, then place skin-up in a non-reactive dish. Refrigerate overnight. The brine will become a soupy mess by morning.

3. Gently rinse off each piece and allow to air-dry on paper towels for two to four hours until a pellicle forms—the tacky (not wet) outer layer of flesh that is so loaded with flavor and helps seal in moisture when the fish is smoking.

4. For the actual smoking I use a Weber “Bullet,” but it’s possible to employ a regular gas grill in a pinch. A water pan is essential for keeping the fish from drying out. For wood chips I like to use fruit trees: apple or cherry. Alder is good too. If not green, the chips need to be immersed in a bucket of water for 30 minutes, then tossed on the coals in handfuls throughout the smoking process. Everyone has their own theories about temperature and smoking duration. Hot smoking will always be quicker than cold smoking. I try to keep the smoker below 250 degrees, and for smaller species like silvers and pinks this means about an hour and a half of smoking.

5. The last step is vacuum-sealing. I’ve kept properly packaged smoked salmon in the freezer for two years without any appreciable loss of flavor or tenderness.

Blackberry Must & Citrus Cured Salmon

Another option is cured salmon. While making blackberry wine I saved the leftover must to cure fresh salmon. 

2 lb salmon fillet(s)
3/4 cup pickling salt
1 cup brown sugar
1 each zest of a lemon, lime & orange
1 teaspoon peppercorns
1 sprig thyme
1 bay leaf
1 cup blackberry must*

* If you happen to have some blackberry must laying around, by all means use it. If not, the rest of the ingredients make an excellent cure on their own.

Mix all ingredients minus the must in a food processor. Next add the must a little at a time, enough to color the cure but not so much as to make it soggy. Spread a thick layer of cure on bottom of non-reactive dish, up to 1/4 inch. Lay salmon, skin side up, on top of cure, then pack remaining cure on top of the salmon. Cover salmon with plastic wrap and weight down with a few pounds (e.g., cans from the cupboard). Flip salmon in 12 hours. Salmon is finished after 24 hours. Rinse and dry.

The cured salmon will be darker, with an attractive, slightly purple hue from the must, plus there will be a smattering of blackberry seeds that give it extra texture. Slice thinly off the top and eat within a week. I had mine on pumpernickel with a dollop of creme fraiche and chives.


Vitamin C-Bomb

Right about this time of year is when the gate-crashing usually starts. My 4-year-old and 8-year-old bring the uninvited guests home from school. First sniffles, then coughs, and finally all-night hacking. The cycle repeats itself through the winter on a seemingly endless loop of crusty noses, balled-up tissue paper, and general grumpiness.

Whoever discovers a cure for the common cold will be richer than Midas, if not richer than the guy who can make hangovers go away, but in the meantime we’ve got vitamin C. It just so happens that rosehips—the red, globular fruit of the rose—have vitamin C in spades. I picked some the other day with food reporter Leslie Kelly, who writes for the Amazon food blog Aldente among other publications. This was urban foraging at its best, with good views of float planes landing on Lake Union and the Space Needle looming overhead. Leslie even filmed a bit of the action.

They say hips are at their best after first frost but I don’t have time to wait until Halloween before visitors scarier than trick-or-treaters start knocking at the door. With about a quart’s worth I made syrup. It’s pretty simple. First grind the hips in a food processor, then cover with water and simmer for 30 or so minutes before running the mush through a food mill and then straining out the pulp. You can save the pulp for other purposes. The strained juice goes back in the pot with sugar—or better yet, honey—to taste, and any other odds and ends such as cloves, cinnamon, or ginger—and voila: a Vitamin C-Bomb that can be mixed into juice or water for the kids—or used for more gustatory purposes in desserts, sauces, jams, or even cocktails.

So next time you’re out and about and you spy some of those bright red vitamin C-bombs, do the hip shake, babe.

Pickled Porcini


IF YOU WANT TO pick mountain porcini in the Cascades, you best keep your ear to the wall. No one casually gives up their patches. It’s hard enough to predict where and when the buggers will fruit as it is.

A couple weeks ago while picking huckleberries I got a tip from some hikers that a lot of mushrooms were fruiting to the south. The next day made an educated guess about where to go. Mountain porcini like high elevations, and they’re picky about tree composition. True firs and spruce are the ticket. After a three-mile hike I started to see them—first some blown-out flags in the sunny areas and then fetching number one buttons emerging out of the duff in more shaded spots.

When picking porcini, always make sure to field dress them right away. I trim the end to check for worm holes, then cut the mushroom in half. Often a pristine looking bolete will show signs of bugs once you slice it open, but the infestations will just as often be local to a small area of the cap or stem that can be trimmed away. Whatever you do, don’t simply put a porcino in your basket to trim later at home. I’ve learned the hard way that a basketful of beautiful buttons can be a worm-ridden mess by the time you get home if you don’t deal with the bugs immediately.

By the end of the day I had nearly ten pounds of mostly perfect porcini buttons (having thrown away twice that amount as too far gone). What a dilemma! I had more porcini than I could use. Some I cooked, some I gave away, and the rest got pickled.

Pickled Porcini

My friend Cora, who stars in the morel hunting chapter of Fat of the Land the book, passed this recipe along to me from his father’s cousin, who lives in Cortemiglia, Italy. She gathers twenty to fifty pounds of porcini annually, so putting up is a must. 

1 pound fresh porcini buttons, halved or quartered
1 cup white vinegar
1 cup water
salt
olive oil
2 lemon peels per jar
2 dried red chili peppers per jar
1/2 tsp peppercorns per jar
(optional) other fresh herbs and spices such as thyme or oregano

1. Clean and cut up porcini buttons, then spread on a baking sheet. Cover generously with salt and set aside for at least an hour, until the mushrooms have shed much of their water. Drain and lightly rinse under tap in a colander.

2. Bring vinegar and water to boil. There should be enough liquid to cover mushrooms. Increase amounts for larger batches, keeping the ratio of vinegar to water at 1:1. Simmer porcini for 2 – 3 minutes. Drain on paper towels and set aside to dry for a few hours.

3. Pack sterilized jars with porcini, lemon peels, chili peppers, and peppercorns, then fill with olive oil (try both extra virgin and light olive oils to determine taste preference). Keep refrigerated.